Google Authentication in Express.js with TypeScript, Mongoose & JWT
Learn how to implement Google Authentication in an Express.js application using TypeScript, Passport.js, MongoDB with Mongoose, and JWT authentication
In this blog, we will implement a production-grade Google OAuth2.0 authentication workflow. Instead of relying on traditional stateful server sessions, we handle the Google callback using Passport.js and generate our own JWT access and refresh tokens.
🛠️ Template Note The Google Authentication setup used in this tutorial is also included inside my open-source template, express-ts-template, alongside other features like local JWT authentication, file uploads, and a structured production-ready backend setup.
When handling social logins while maintaining a stateless JWT ecosystem, follow this flow:
[User] --- 1. GET /auth/google ---> [Passport Engine] ---> (Redirects to Google Sign-In)[User] <--- 2. Grants Permission -- [Google Server][Backend Callback] <-- 3. Code/Profile Handshake <-- [Google Server] (Verifies & Upserts User Profile)[User] <--- 4. Sets Secure Access & Refresh Cookies --- [Backend Controller] (Generates Custom JWTs)-
No Server-Side Sessions: We explicitly disable
passportsession serialization (session: false) because our app uses stateless JWT tokens. -
User Accounts Linking: If a user registers normally with an email address and later hits the “Sign In with Google” button, we automatically link the identity by pinning the
googleIdonto the pre-existing document profile.
└── src/ ├── config/ ├── controllers/ ├── middlewares/ ├── models/ ├── routes/ ├── utils/ ├── app.ts └── index.ts├── .envExecute the following installation string to fetch Passport.js, the Google OAuth2.0 strategy token extensions, and their respective type-hint definitions:
npm install passport passport-google-oauth20 jsonwebtoken cookie-parser bcrypt mongoosenpm install -D @types/passport-google-oauth20Before writing software, you need application credentials from the Google Cloud Dashboard.
-
Navigate to the Google Cloud Console.
-
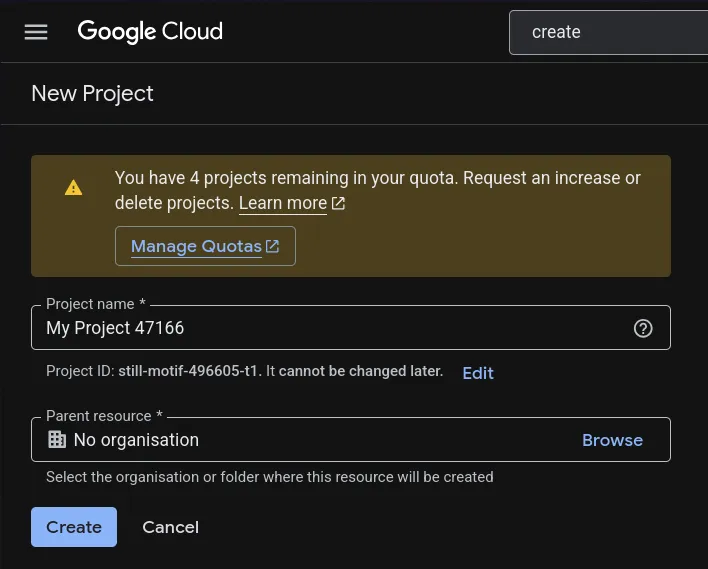
Create a New Project using the project selection drop-down layout.
-
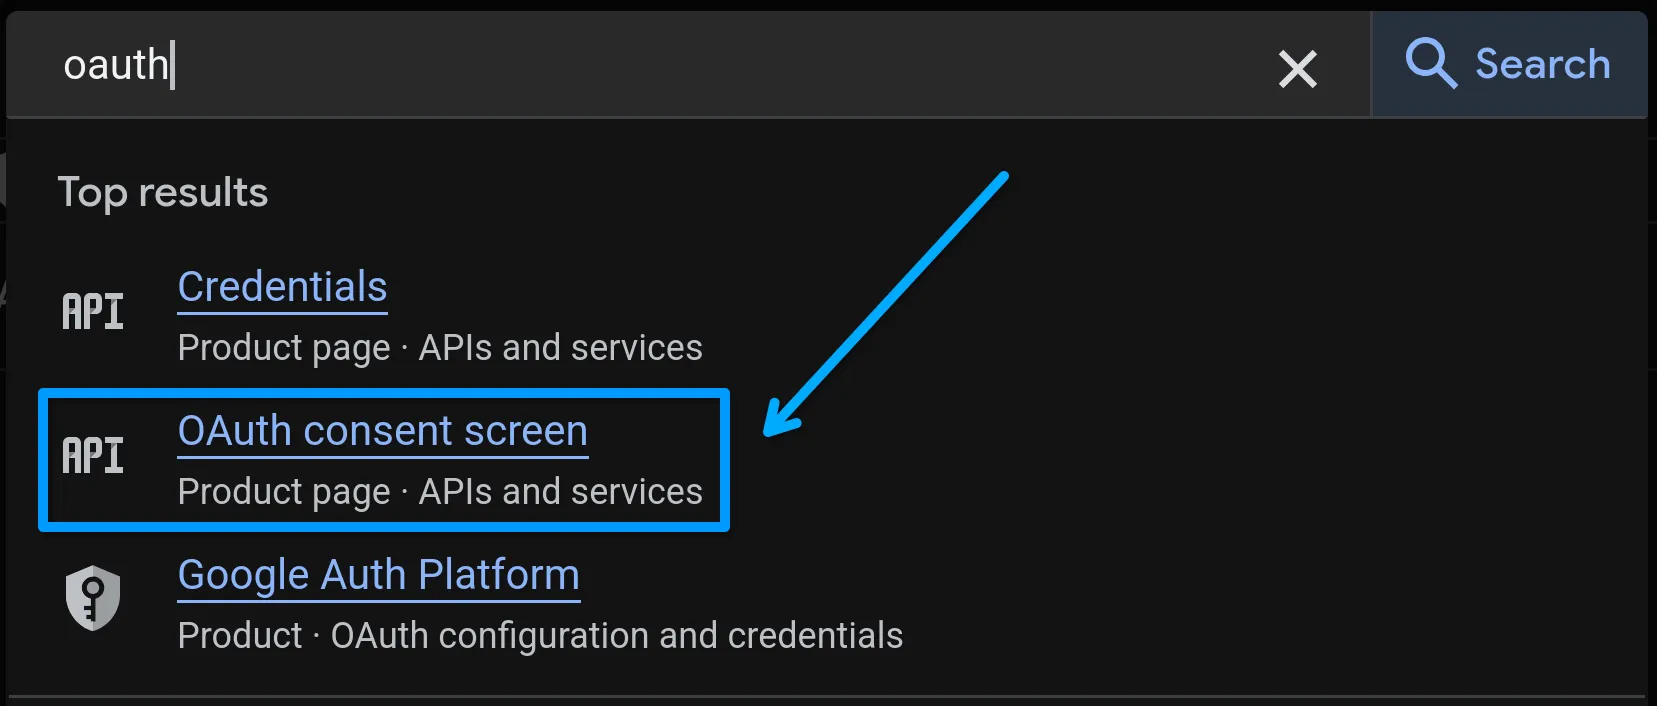
Configure your OAuth Consent Screen and designate the publishing status as External.
-
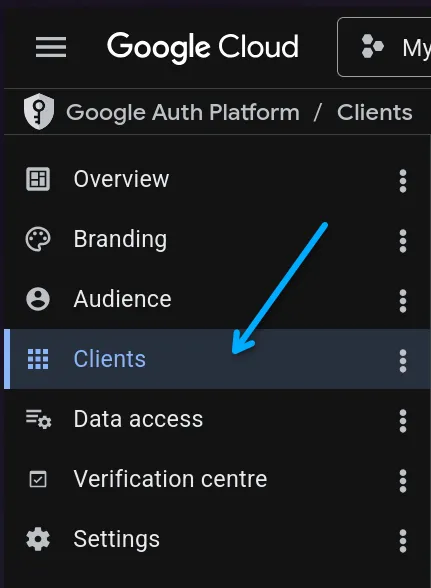
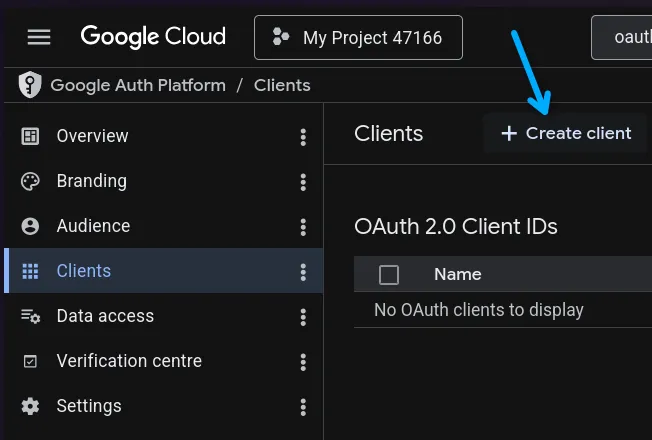
Head to the Clients page, choose Create Clients, and click OAuth Client ID.
-
Set the application type to Web Application and add your explicit callback mapping:
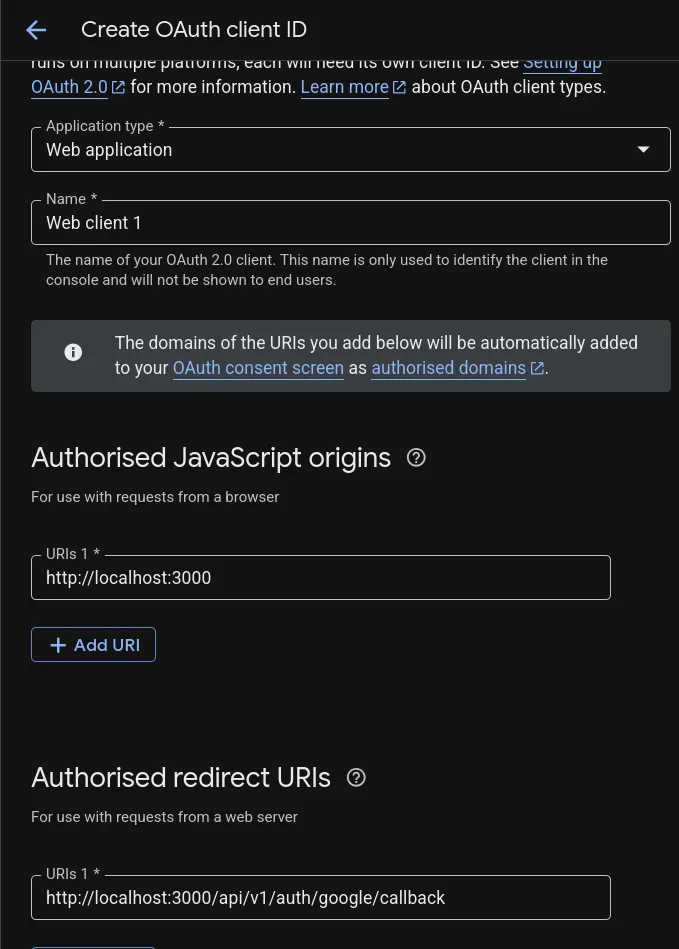
- Authorized Redirect URIs:
http://localhost:3000/api/v1/auth/google/callback
- Save your changes and copy your Client ID and Client Secret tokens.
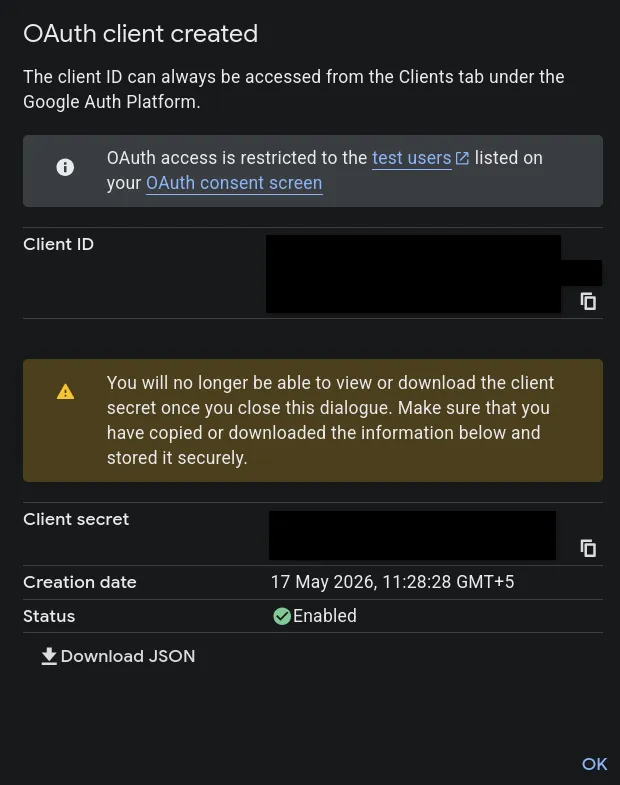
Append these key-value configurations to your root .env file environment block:
GOOGLE_CLIENT_ID=your_google_client_id_hereGOOGLE_CLIENT_SECRET=your_google_client_secret_hereGOOGLE_CALLBACK_URL=http://localhost:3000/api/v1/auth/google/callbackTo support alternative OAuth logins alongside traditional password profiles, update your Mongoose Model configuration.
🔒 Critical Security Rule When integrating third-party OAuth provider chains, you must make your schema’s
passwordstring optional (required: false). This allows users who signed up with Google to create accounts without passwords.
Make sure these key fields are mapped out in your user schema definitions:
const userSchema = new Schema({  username: { type: String, required: true, unique: true },  email: { type: String, required: true, unique: true },
  // Make password optional for OAuth registrations!  password: { type: String, required: false },
  avatarUrl: { type: String },  refreshToken: { type: String },  googleId: { type: String } // Keeps track of mapped Google profiles});
To maintain security, place an evaluation guard inside your traditional login controllers so social-only accounts cannot be hijacked through brute-force attempts:
if (!user.password) { throw new ApiError(400, "This account was registered via Google Sign-In. Please log in using Google.");}Now we configure Passport to handle Google authentication.
Here we:
- receive the Google profile
- check if the user already exists
- create a new account if needed
- link existing accounts using email
import passport from "passport";import { Strategy as GoogleStrategy } from "passport-google-oauth20";import { User } from "../models/User.model.js";import { generateUsername } from "../utils/usernameGen.js";
passport.use(  new GoogleStrategy(    {      clientID: process.env.GOOGLE_CLIENT_ID!,      clientSecret: process.env.GOOGLE_CLIENT_SECRET!,      callbackURL: process.env.GOOGLE_CALLBACK_URL,    },    async (_accessToken, _refreshToken, profile, done) => {      try {        const email = profile.emails?.[0]?.value;
        if (!email) {          return done(new Error("Google account profile must yield a primary email address"));        }
        // Look for an existing account matching either the googleId OR the email address        let user = await User.findOne({          $or: [{ googleId: profile.id }, { email }],        });
        // Case 1: Account exists but lacks a googleId link (First-time social login for an existing user)        if (user && !user.googleId) {          user.googleId = profile.id;          await user.save();        }
        // Case 2: No account exists under this email - Create a brand new user profile        if (!user) {          const uniqueUsername = await generateUsername(profile.displayName);
          user = await User.create({            username: uniqueUsername,            fullName: profile.displayName,            email,            googleId: profile.id,            avatarUrl: profile.photos?.[0]?.value || "",          });        }
        // Remove sensitive fields before returning the user        const sanitizedUser = await User.findById(user._id).select("-password -refreshToken -googleId");        if (!sanitizedUser) {          return done(new Error("User not found after creation"));        }
        return done(null, sanitizedUser);      } catch (error) {        return done(error as Error);      }    }  ));
export default passport;When creating users via OAuth, Google provides full display names, which aren’t guaranteed to be unique, so we generate a fallback username if needed.:
src/utils/usernameGen.ts
import { User } from "../models/User.model.js";
export const generateUsername = async (  displayName: string): Promise<string> => {  const cleaned = displayName    .toLowerCase()    .replace(/[^a-z0-9]/g, "");
  const baseUsername =    cleaned.length > 0      ? cleaned.slice(0, 15)      : "user";
  let username = "";  let exists = true;
  while (exists) {    const suffix = Math.floor(      1000 + Math.random() * 9000    );
    username = `${baseUsername}${suffix}`;
    exists = !!(await User.exists({      username,    }));  }
return username;};Once Passport successfully authenticates the user, control moves to our controller.. Here, we generate our custom app cookies and pass down the response payload.
src/controllers/auth.controller.ts
import { type Request, type Response } from "express";import { generateTokens } from "../utils/generateTokens.js";
export const googleAuthCallback = async (req: Request, res: Response) => {  // Passport injects the sanitized profile info onto the req.user property  const user = req.user!;
  // Generate our system's regular custom JWT tokens  const { accessToken, refreshToken } = await generateTokens(user._id);
  const cookieOptions = {    httpOnly: true,    secure: process.env.NODE_ENV === "production",    sameSite: "strict" as const,  };
return res .status(200) .cookie("accessToken", accessToken, cookieOptions) .cookie("refreshToken", refreshToken, cookieOptions) .json({ success: true, message: "Google authentication handshake completed successfully", user, });};src/routes/auth.routes.ts
import { Router } from "express";import passport from "passport";import { googleAuthCallback } from "../controllers/auth.controller.js";
const router = Router();
// Route 1: Initial redirect request loop triggerrouter.route("/google").get(  passport.authenticate("google", {    scope: ["profile", "email"], // Target scope values required from Google Cloud console    session: false, // Ensures stateless JWT operations  }));
// Route 2: Target route intercept landing zone for redirect returns from Googlerouter.route("/google/callback").get(  passport.authenticate("google", {    failureRedirect: "/login",    session: false,    failureMessage: "Failed to login with Google credentials",  }),  googleAuthCallback);
export default router;Finally, register and load the Passport setup directly within your core runtime file (app.ts) before mounting your routes.
src/app.ts
import express from "express";import cookieParser from "cookie-parser";import passport from "./config/passport.js"; // Loads strategy definitionsimport authRouter from "./routes/auth.routes.js";
const app = express();
app.use(express.json());app.use(cookieParser());
// Initialize Passport Engineapp.use(passport.initialize());
// App Routesapp.use("/api/v1/auth", authRouter);
export { app };⚠️ Common Bug: Redirection URI Mismatch Errors If Google dumps a configuration block error message on your display screen during testing, double-check that your callback strings match exactly across all three of these locations:
The Allowed Callback parameter mapped inside your Cloud Dashboard Console.
The
GOOGLE_CALLBACK_URLliteral configuration inside your.envworkspace variables.The
callbackURLproperty parameter initialized inside your Passport strategy constructor instantiation block.
-
Made backend password strings optional (
required: false) on database models. -
Set
session: falseacross all routing hooks to stay completely stateless. -
Bound fallback profile configurations matching
profile.emails?.[0]?.valuequeries. -
Handled unique namespace fallback conflicts using clean alphanumeric deduplication utility logic.
Happy coding! 🚀